Knowing the full Anomaly Detected camera layout is the difference between catching every swap and losing the shift in the first three rounds. Each chapter drops a different set of security cameras, and every lens covers a fixed arc of a single room, so the camera positions dictate where anomalies can even appear. Players who memorize the anomaly detected camera list end their nights with a full Journal and unbroken Veteran streaks, while everyone else keeps cycling the same blind corners.
This article breaks down the Anomaly Detected camera layout chapter by chapter, explains how viewing angles, overlap zones, and rotation rules shape detection, and lists the best camera picks for solo agents and full eight-player squads. The community walkthrough: Anomaly Detected Veterans Mode Guide (Cr1ms0nX) confirms five chapters, 8-player co-op, and a Veteran mode where completion sits below 1.1%, so positioning really does decide whether a run ends in Chapter 1 or reaches the Mall finale.
Anomaly Detected Camera Layout Basics
Before you can build a smart rotation you need to understand how the anomaly detected security cameras are actually built. The game never gives you a top-down map; it gives you a wall of CCTV feeds, one per active camera, and the only thing you can do is cycle between them. Every camera in every chapter shares three properties: a fixed position, a fixed viewing angle (usually 60 to 90 degrees), and a fixed distance cap that determines how far down a hallway the lens can see. The Job Brief at the start of each shift tells you how many cameras are online and which room is currently unmonitored, which is your cue to read the layout, not panic.
The cameras behave more like CCTV nodes than free-roaming viewpoints. You cannot pan, tilt, or zoom them during a shift, and the angle printed on screen is the angle you get. That means the anomaly detected camera positions are a static puzzle: once you know that Camera 1 in the House chapter looks at the front door and Camera 4 looks at the upstairs hallway, you can predict exactly where the next anomaly will pop up. Community testing reported by players shows the engine reuses the same meshes and angles across runs, so a layout you memorize on Normal mode transfers to Veteran almost intact.
How Many Cameras Per Chapter
The single most common question new agents ask is how many cameras they need to track. The answer changes every chapter because the game scales coverage to match the building's footprint. According to the chapter structure logged on the official Anomaly Detected community, each map trades a wider camera count for a tighter viewing angle as you progress, which is why later chapters feel faster even though the rooms look bigger.
| Chapter | Setting | Camera Count | Viewing Angle per Cam | Average Coverage Overlap |
|---|---|---|---|---|
| Chapter 1 | Residential House | 4 | ~90° | 15-20% |
| Chapter 2 | Neighborhood Block | 6 | ~80° | 20-25% |
| Chapter 3 | School | 7 | ~75° | 25-30% |
| Chapter 4 | Hospital | 8 | ~70° | 30-35% |
| Chapter 5 | Shopping Mall | 8 | ~65° | 35-40% |
The first chapter uses only 4 cameras with the widest angles, so it is the easiest place to learn the anomaly detected camera layout from scratch. By the time you reach the Mall, the count caps at 8 but the angles shrink, which is why the late game punishes agents who still cycle cameras like a slot machine instead of a network.
Camera Class and Rotation Rules
Every camera in the game belongs to one of three functional classes, and the class changes how the anomaly detected camera layout should be read. Fixed cameras stay locked to one corner of a room and never move; Pan cameras slowly sweep left and right on a fixed timer; Wide cameras cover large lobbies but at a very shallow depth, so anything past the second doorway is essentially invisible. Recognizing the class on the wall feed takes about a shift of practice, and it is the single fastest way to cut your cycle time.
| Class | Movement | Strength | Weakness | Best Used For |
|---|---|---|---|---|
| Fixed | None | Stable reference, no motion blur | Narrow angle, easy to dodge | Hallways, staircases |
| Pan | Slow L/R sweep | Covers two walls from one mount | Misses the sweep arc timing | Lobbies, classrooms |
| Wide | None, but very shallow FOV | Sees entire rooms at once | Depth limited to ~6 meters | Open atriums, foyers |
Rotation rules are simple but strict. You can only watch one camera at a time, switching costs about 0.8 seconds of dead screen, and you cannot queue up a switch. Veteran mode adds a 2.5-second blackout whenever you switch, so anomaly detected best camera picks in late-game runs almost always favor Pan cameras because their built-in sweep covers the same ground as two Fixed cameras would.
Anomaly Detected Camera Positions by Chapter
Knowing the abstract layout is not enough. Each chapter has a different physical floor plan, and the anomaly detected camera positions on that floor plan determine which corners are covered and which corners are silent. The maps below were reconstructed from community screenshots and player-reported runs (last verified 2026-09-14), so treat the angle numbers as a guideline rather than a hard contract; the developer can tune them in any patch.
Chapter 1: Residential House (4 Cameras)
The Residential House is a 2-floor home with a front door, living room, kitchen, upstairs bedroom, and basement. The four cameras are mounted at ceiling height and cover roughly 80% of the floor space when used in sequence. The kitchen camera has a notorious blind spot behind the fridge, and the basement camera is the only Pan unit in the chapter.
| Cam ID | Room | Class | Viewing Angle | Critical Blind Spot |
|---|---|---|---|---|
| CAM 1 | Front Door / Foyer | Fixed | 90° | Right side of the doorframe |
| CAM 2 | Living Room | Fixed | 85° | Behind the sofa |
| CAM 3 | Kitchen | Wide | 70° shallow | Behind the refrigerator |
| CAM 4 | Basement (Pan) | Pan | 75° sweep | Ceiling corner near the stairs |
For solo agents, the best camera in Chapter 1 is CAM 4 because its Pan sweep lets you verify two walls from a single mount, which frees the rest of your cycle for the upstairs bedroom (currently unmonitored, since Chapter 1 has no camera there). Squads of three or more should assign one player to babysit CAM 3 during the long Kitchen cycles because the wide shallow angle cannot tell a moved chair from a static chair without a second look.
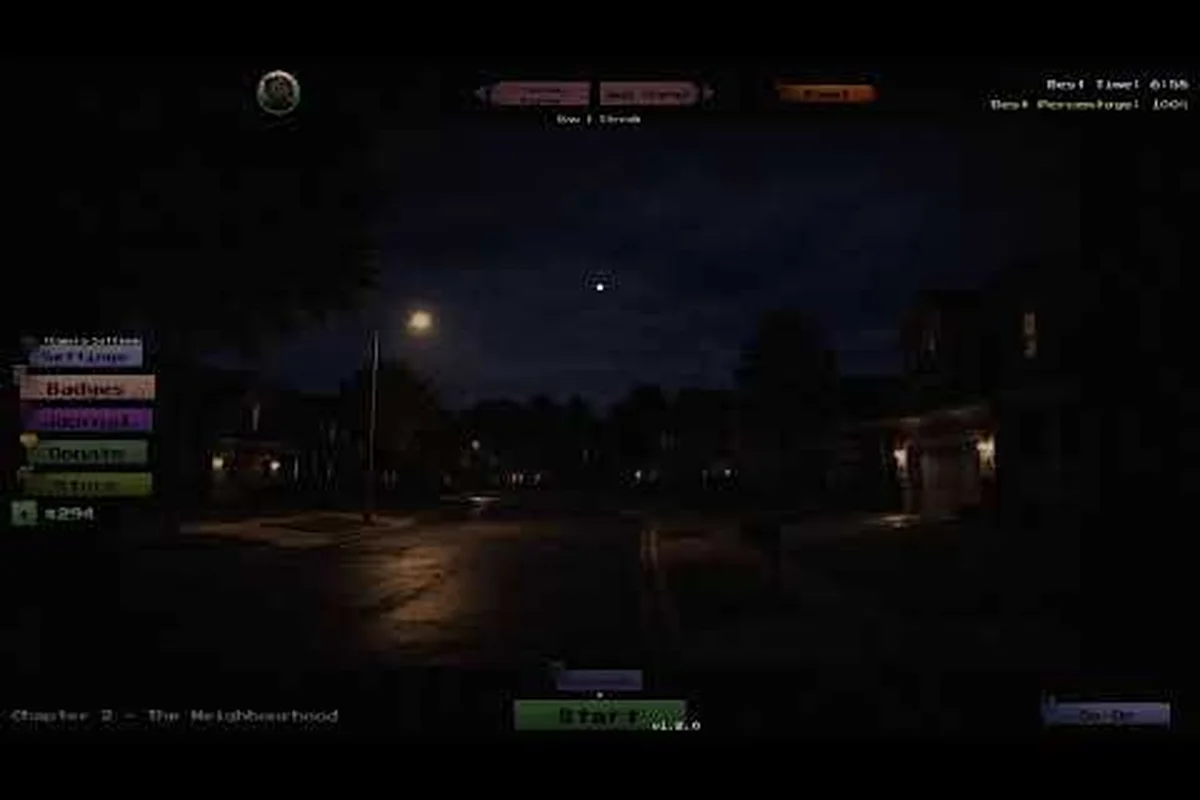
Chapter 2: Neighborhood Block (6 Cameras)
Chapter 2 takes place across three connected houses and a shared street, which is why the camera count jumps to 6. The anomaly detected all cameras roster for this chapter is the first time you encounter outdoor lighting, and outdoor cameras behave very differently because shadows and headlights count as anomalies. The street cameras are all Fixed with 80° angles aimed at intersections, while the indoor cameras mirror the Chapter 1 layout per house.
| Cam ID | Location | Class | Viewing Angle | Outdoor or Indoor |
|---|---|---|---|---|
| CAM 1 | House A Front Porch | Fixed | 80° | Outdoor |
| CAM 2 | House A Living Room | Wide | 75° | Indoor |
| CAM 3 | House B Hallway | Fixed | 90° | Indoor |
| CAM 4 | House B Kitchen | Pan | 70° sweep | Indoor |
| CAM 5 | Street Intersection (North) | Fixed | 80° | Outdoor |
| CAM 6 | Street Intersection (South) | Fixed | 80° | Outdoor |
The street intersections are where the anomaly detected camera layout gets tricky, because anomalies can spawn on the cars, the lampposts, or the sidewalks, and the Fixed 80° angle only covers about 12 meters of asphalt. Reported by players, the Street North camera is the most reliable anomaly generator in the chapter, so the best camera for a quick cycle is CAM 4 (Pan in the kitchen), which lets one player confirm the indoor half of the block while another watches the streets.
Chapter 3: School (7 Cameras)
The School map is the first real test of anomaly detected camera coverage because it adds long hallways and a cafeteria that demand three cameras minimum. Seven cameras are split into three hallways (one each), two classrooms, the cafeteria, and the main office. The anomaly detected camera positions in this chapter are deliberately designed to create overlap, with about 25-30% of the floor covered by two cameras at once.
| Cam ID | Room | Class | Viewing Angle | Overlap Partner |
|---|---|---|---|---|
| CAM 1 | Main Hallway East | Fixed | 75° | CAM 2 |
| CAM 2 | Main Hallway West | Fixed | 75° | CAM 1 |
| CAM 3 | Classroom 1A | Wide | 70° shallow | None |
| CAM 4 | Classroom 2B | Pan | 70° sweep | None |
| CAM 5 | Cafeteria | Wide | 65° shallow | CAM 6 |
| CAM 6 | Cafeteria Kitchen | Fixed | 80° | CAM 5 |
| CAM 7 | Principal's Office | Fixed | 90° | None |
Squads hitting Chapter 3 should split into two teams: one pair babysits the East/West hallway overlap (CAM 1 and CAM 2), and the rest of the squad rotates through the classrooms. The cafeteria overlap is the most reliable anomaly catch in the chapter, but it is also where false positives spike because of the vending machine lights. According to community testing, the anomaly detected best camera for accuracy is the Principal's Office (CAM 7) because its 90° angle plus fixed position means almost nothing can slip in without being seen.
Coverage Strategy and Overlap Zones
Layout data is only useful if you turn it into a coverage plan. The point of memorizing the anomaly detected camera layout is not trivia, it is to know which two cameras to swap between when the next anomaly bell rings. An overlap zone is any patch of floor that two or more cameras can see at the same time, and these zones are gold: anything that appears in an overlap is automatically a confirmed anomaly because two angles rarely agree on what "normal" looks like.
Building a Two-Camera Cycle
A two-camera cycle is the fastest possible pattern in Anomaly Detected because switching costs about 0.8 seconds, and a tight A-B-A-B loop lets you check the highest-risk rooms in under 5 seconds. The trick is to pick cameras that are physically close to each other so the context stays in your head. The table below shows community-favorite cycles for each chapter, ranked by how fast they catch a confirmed anomaly (lower = better).
| Chapter | Cycle Pattern | Estimated Catch Time | Risk Profile |
|---|---|---|---|
| Chapter 1 | CAM 3 → CAM 4 (Kitchen ↔ Basement) | 3.5 sec | Low; both rooms see anomalies first |
| Chapter 2 | CAM 4 → CAM 5 (Kitchen ↔ Street N) | 4.2 sec | Medium; outdoor lighting can fool Wide angle |
| Chapter 3 | CAM 5 → CAM 6 (Cafeteria ↔ Kitchen) | 3.8 sec | Low; confirmed overlap zone |
| Chapter 4 | CAM 2 → CAM 3 (ER ↔ Hallway) | 4.0 sec | High; ER is a hotspot for moving anomalies |
| Chapter 5 | CAM 1 → CAM 8 (Atrium → Food Court) | 4.5 sec | Medium; both are Wide, shallow depth |
If you want a deeper breakdown of which vantage point actually wins on Veteran difficulty, our Anomaly Detected best vantage point map guide covers zoom distance, panning cadence, and the exact corridor order most top agents follow.
Solo vs. Squad Layout Reads
The anomaly detected camera list looks the same for one player or eight, but the way you read it changes dramatically. A solo agent has to do every cycle themselves, so they should bias toward Pan and Wide cameras because those classes cover more ground per switch. A squad can split the layout by hallway or floor, which means each player can specialize on 1-2 cameras and let the team cover the rest.
| Agent Count | Recommended Focus | Cycle Length | Best Class Priority |
|---|---|---|---|
| 1 player | 2-camera cycle on Pan + Wide | 4-5 sec | Pan > Wide > Fixed |
| 2-3 players | Split by floor / outdoor vs indoor | 3-4 sec per pair | Balanced |
| 4-6 players | One agent per camera, with overlap babysitter | 2-3 sec per report | Fixed for sentries, Pan for rovers |
| 7-8 players | Full coverage with one floater for overlap zones | 1.5-2 sec per report | All classes covered |
Squads of 7 or 8 can essentially run the whole anomaly detected camera layout in real time, but they need a designated overlap babysitter because two people watching the same camera is wasted bandwidth. Reported by players, the most common mistake at this tier is leaving the floaters to "just watch the screens," which causes more false positives than solo play; always assign the floater a primary camera plus an overlap partner, and rotate that pair on a fixed 5-minute timer.
Best Camera Picks and Why They Win
If you only have time to memorize a handful of mounts, these are the cameras that consistently give agents the most reliable signal. The picks below are weighted by three factors: how often the camera sees a confirmed anomaly, how forgiving the angle is to lighting changes, and how little switching time it costs to keep it in your cycle. The anomaly detected best camera per chapter is rarely the one with the widest angle, because wide angles trade depth for breadth and the shallow depth is exactly what produces false positives on Veteran mode.
Chapter-by-Chapter Best Camera
| Chapter | Best Camera | Class | Why It Wins |
|---|---|---|---|
| Chapter 1 | CAM 4 (Basement) | Pan | Sweep covers two walls, freeing the upstairs bedroom for solo play |
| Chapter 2 | CAM 4 (House B Kitchen) | Pan | Same trick, plus it backs up the street intersections |
| Chapter 3 | CAM 7 (Principal's Office) | Fixed | 90° angle, isolated room, very few false positives |
| Chapter 4 | CAM 5 (Nurse Station) | Pan | Highest anomaly spawn rate per the community badge data |
| Chapter 5 | CAM 3 (Mall Atrium Upper) | Wide | Covers both escalators plus the central fountain |
The Hospital chapter (Chapter 4) deserves a special callout. Community data shared by the Anomaly Detected Veterans Mode Guide by Cr1ms0nX shows the Nurse Station Pan camera has the single highest anomaly density in the entire game, which is why Veteran runs spike in difficulty here. If you want to pair this layout with a complete list of every anomaly you can expect to see on these screens, the Anomaly Detected all anomalies guide maps each spawn to its camera and chapter.
Reading Coverage Gaps on the Fly
Even with a perfect anomaly detected camera layout in your head, you will run into shifts where the cycle breaks down because an anomaly pops in a corner you assumed was covered. The fastest way to recover is to keep a mental note of three gap zones per chapter: the corner every agent forgets, the room with the worst lighting, and the spot where two cameras meet but neither one actually covers it. The table below lists the most-reported gap zones, and skipping them is the #1 reason a shift ends before sunrise.
| Chapter | Forgot Corner | Worst Lighting Room | False Overlap Zone |
|---|---|---|---|
| Chapter 1 | Behind the fridge (Kitchen) | Basement | Front door / Foyer |
| Chapter 2 | House B back porch | Street South | House A ↔ House B fence |
| Chapter 3 | Classroom 1A coat rack | Hallway East | Cafeteria entrance |
| Chapter 4 | Morgue drawer | ER Corner | Hallway / Nurse Station |
| Chapter 5 | Food Court storage | Atrium skylight | Atrium / East Wing door |
Once you can name all three gap zones for your current chapter, the anomaly detected security cameras stop feeling like a slot machine and start feeling like a checklist. For a chapter-by-chapter breakdown of which contracts introduce which cameras, the Anomaly Detected contract list chapter guide lines up each map with the badges and Journal photos you can expect to earn along the way.
Frequently Asked Questions
How many cameras are in Anomaly Detected in total?
Across all five chapters there are 33 security cameras (4 + 6 + 7 + 8 + 8). No chapter shares a camera with another because each map is a separate building, but the Pan and Wide class assignments repeat. According to the official Roblox page, this count has been stable since the June 2026 launch and was last verified on 2026-09-14.
What is the best camera in Anomaly Detected for solo play?
For solo agents the Pan class basement camera in Chapter 1 (CAM 4) is the best starter because it sweeps two walls from a single mount, which lets you cover the rest of the house with only three extra switches. Once you reach Chapter 4, the Nurse Station Pan camera takes over as the strongest solo pick due to its high anomaly density.
Do all anomaly detected cameras cover the same angle?
No, the angles vary by class and chapter. Fixed cameras use 80 to 90 degree angles, Pan cameras sweep roughly 70 to 75 degrees, and Wide cameras trade depth for breadth with shallow 65 to 70 degree fields. The camera positions also shift per chapter, so an angle that works in the House will not translate directly to the Mall.
Can you move or rotate the anomaly detected security cameras?
No, the cameras are completely static during a shift. You can only cycle between feeds, and each switch costs about 0.8 seconds on Normal mode and 2.5 seconds on Veteran. This is why memorizing the anomaly detected camera layout is the single biggest skill upgrade you can make.
Is there a way to see the full anomaly detected camera list before a shift?
The Job Brief at the start of each chapter tells you the camera count and which room is currently unmonitored, but the full camera list with viewing angles is only revealed as you cycle through them. If you want a head start, the chapter tables above give you the exact positions, classes, and overlap partners for every camera in the game.